 How to Draw A squirted
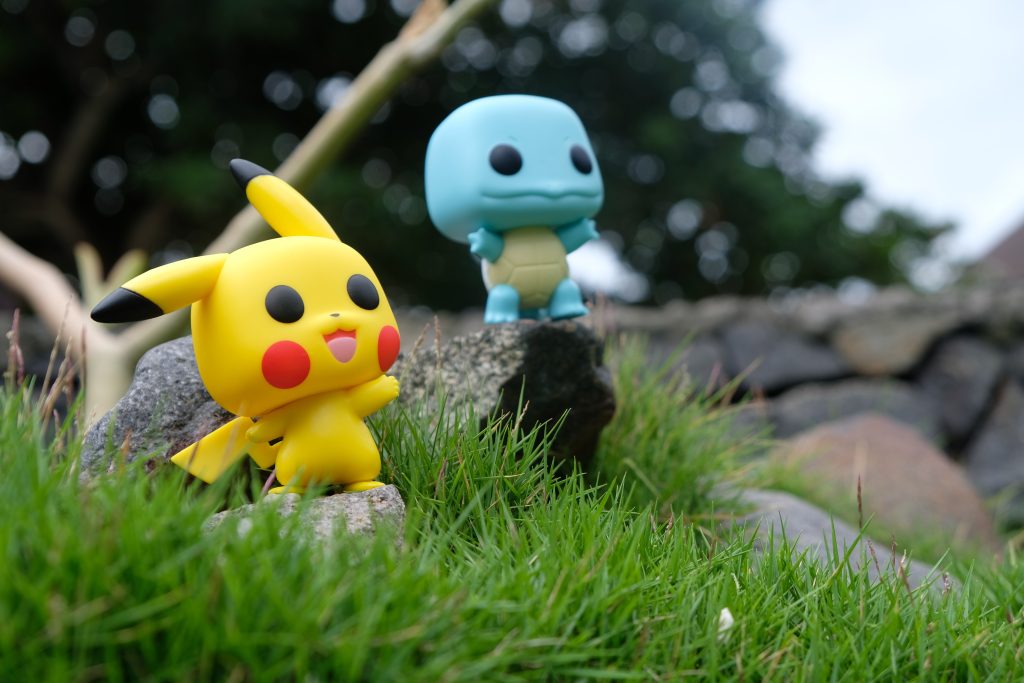
The Pokémon sequel is full of numerous weird and extraordinary creatures. Everyone has their favorite, and when it comes to favorite Pokémon, squirted gets a lot of mentions!
Also, check our Cat Coloring Pages.
This Water-type Pokémon has been with us from the start, and it’s a Pokémon that’s as skilled as it is cute! Because it is so cute, many fans would like to know how to draw squirted. If you’re one of those fans, this guide will show you how easy it can be!
How to Draw A squirted
Step 1
For the first step of our squirted drawing guide, let’s start with the head. squire’s head is round and appears almost circular except for a portion that protrudes from the base of the head. squire’s eyes can be tricky, so stick strictly to the reference image when drawing! The eyes appear oval with a flat base, as shown in the reference image. Then you can use some curved lines in it to create some pupil details for them. Finally, you can use a long curved line for her smiling mouth for this step. That’s it for this step; let’s start drawing her body!
Step 2
You have drawn squire’s head, and in this next step of your squirted drawing, you can start drawing a body for it. Before doing that, you can add some nostrils and fine lines above the eyes for more detail. Then start with the body by drawing a long round line from the head.
It forms the belly of squirted. Then use more curved lines from the side to create the first arm for squirted. In the end, there are two sharp points for little fingers. Finally, use more curved lines for the leg, resulting in sharper lines for the toes.
Step 3
In our squirted drawing guide step, we will add another arm and start the shell. The arm will be where we start, looking like a thick oval with sharp points at the end. Once you have this arm, you can start drawing the shell.
The outer edge will be a rounded line, and there will be a thin, curved edge. Ensure you leave a gap at the bottom of the shell-like we did in the reference image.
Because that’s where we’ll be pulling a leg soon, finish this step by drawing some curved details of the shell, and then you’re good to go!
Step 4
Your squirted design is now taking shape! We’ll add the final details in the next few steps before coloring it. Use a different round shape for the other leg with pointed tips at the end.
Finally, you can draw her round, swirling tail from the back of the leg you just drew. Then we move on to the final details, which we will cover in Step 5!
Step 5
It’s almost time to bring this image to life with paint, but first, we need to add a few more details in this step of our sq. hurtle drawing guide. Using a few straight lines, draw a grid pattern on squirrel’s belly, as shown in the reference image
That’s enough for the details in this guide, but you don’t have to stop there! Before proceeding, ensure you add all the details and elements you want! It could be as simple as changing squire’s facial expression or pose, or you could be more ambitious with it.
You could design a background, and this would be a great way to recreate your favorite squirted look. What can you think to finish this squirted drawing before the final step?
Step 6
It brings you to the sixth and final step of your squirted drawing! It is the step where you can relax and enjoy coloring. As you can see in our reference image, squirrel’s main colors are blue, yellow, and brown.
Even if you stick to standard colors, there are many ways to add stunning color variety to this image! If you’ve drawn background details or added other elements, this is a great way to add color variation to your image.
Once you know what colors you want to use, you can also have fun choosing the artistic mediums you’ll use to bring the image to life!
Your squirted Drawing is Finished!